I have a very bare-bones knowledge of HTML, and I've never worked with CSS. My familiarity with HTML comes from my MySpace days, when knowing how to edit the code that was behind your MySpace page layout was huge. I never learned how to build it from scratch, but I knew enough to figure out what certain abbreviations meant, how to change colors of text, etc. So, with that introduction, I will be delving into this new world!
I am going to be utilizing the services offered by Codecademy, to build up as much knowledge as I possibly can.
So, to start off, when they say "Basic," they mean it. But this is fantastic, because there is most definitely a method to the madness. Here's the first of many screenshots that I will be including to show my progress:

Pretty early on, I learned something that I think is interesting. The commands within the < and > brackets are called tags, and they are organized in an order called nesting. This means that the most recently opened tag should be closed first. For example if I want the following sentences, "Hi, my name is Marissa" to be both bold and italicized, I need to open two separate tags: <strong> (command for bold) and <em> (command for italics). Then, I would type my sentence. Next, I would have to close my two tags, and the proper way in which to do this would be </em></strong>.
Okay, so pause for a second--- these two commands alone taught me something new, and really cool! When I used to mess around with HTML on MySpace, the commands for bold and italic were <b> and <i>. Curious as to why this changed, I did some googling. What I came to find was pretty interesting. Apparently, these two commands exist and still are used, and stylistically are the same as <strong> and <em>, but technically they do make a difference. One of the links I explored explained that an example of why you might use <strong> instead of <b> would be in the case of writing software that would read to a blind person. <b> would only look different, not helping the person at all, but <strong> would command the program reading the code to read that particular phrase with more emphasis. Another differentiating factor, this time in the case of italics, would be when <i> is used to stylistically define the name of a book, where as <em> would make more sense in the following sentence for emphasis: "I <em>only</em> accept friend requests from people I know."
Oops, tangent! But I think that is so interesting! Anyway, moving along...

Here's the perfect example of how sensitive this seems to be, in the next screen capture I highlighted and drew arrows to indicate the two tags that made all the difference in my code coming out correctly.

One of the lessons in this section was about the 6 different sizes of headers, and the only way to move on to the next part was to mess around with the different sizes of headers and include one of each. As you may notice, I ran out of things to say, but it was cool to see the differences in size and emphasis that each one offered.

A significant amount of time later, I'm working toward the end of the first section. This section included adding links into the code, as well as images. It then got a little more complicated, by having code that set an image as as link. I can see by this point that the most frustrating thing, much like learning a language, will be remembering all the separate parts (otherwise the code won't work), but I'm still really enjoying this.
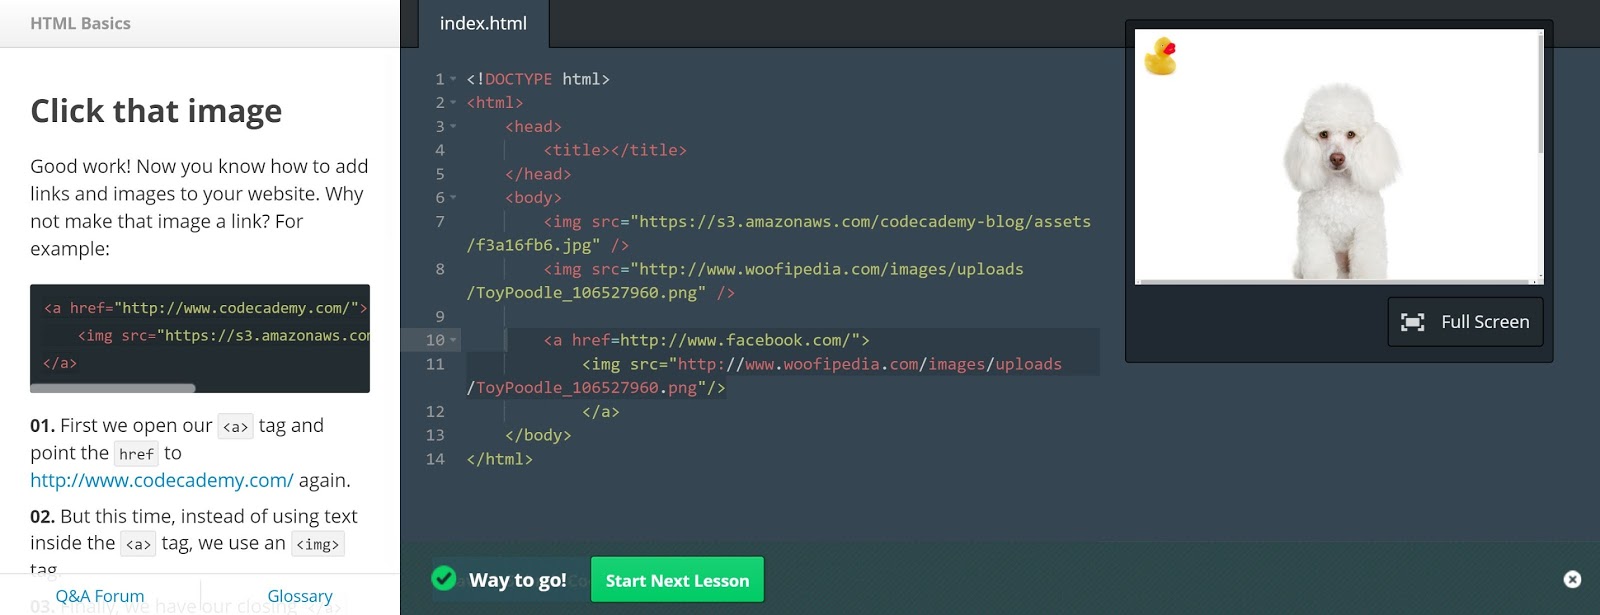
Naturally, I added a picture of a poodle, because I am a fool for poodles.
Guys. Can I just say, this code doesn't look like much, but oh man, am I proud of it:

In code language, I just linked a picture of a puppy to Google (if you click the puppy, it will redirect to google.com) which makes absolutely no sense, but I DID IT!
And with that, I finished the lesson portion of Unit 1. Moving on to the Unit review, the goal is to create a very basic webpage. The directions say to fill it with facts about yourself, so I wrote about my job, a little about school, about the picture is of a poodle who looks like my Paddy!

And finally, my first webpage!!

Going into Unit 2, the introduction tells me that throughout this unit, I'll learn how to make ordered lists, change font size, color, and type, change background color, and align text.
Finally, finally! at this point they address indentation, which is something I've been wondering about. If you were to look at good, proper code, it's all indented so that when you look at a line, you can clearly tell what the command is. If you look at my screenshots, on the other hand, my code is pretty messy-- quite clearly, I'm a beginning and trying to get function over style. I don't have much to show for this lesson, but it did give me a better idea of how to indent lines appropriately.
Moving on, the next part of the unit is ordered lists, and I was able to follow the instructions of using the <ol> and <li> commands to continue the ordered list that the site provided:

Now, what isn't evident from this screenshot is that I struggled a bit on this one. It's easy to get the different commands confused, and I mixed up the commands for the headings and the ordered lists. Headings are differentiated with numbers, <h1>, <h2>, <h3>, whereas ordered lists appear as numbers, but the command is the same each time: <li>. Originally, I was trying to set up my list as <l1>, <l2>, <l3>, which effectively got me nowhere.
In addition to some more practice with ordered lists, I've noticed that my indentation looks a lot better, my code is far more readable!
Again, the theme of this section appears to be "Minuscule changes to confuse Marissa," and next up on the list: The difference between numbered lists and bulleted lists is one letter! A numbered list opens with <ol>, a bulleted list begins with <ul>.

Pay no attention to the thoughts that plague me. I'm (mostly) kidding. But look at that bulleted list! Skills!
Funny thing is, I've started thinking in terms of HTML while writing this blog post. I keep thinking to type <br> instead of hitting enter, or <strong> instead of bold, or <em> instead of italics! It's becoming second nature!
Oooh, in this next section they're going full inception on me, lists within lists! This requires attention to the nested tags. Here's what I came out with:

Not too bad!
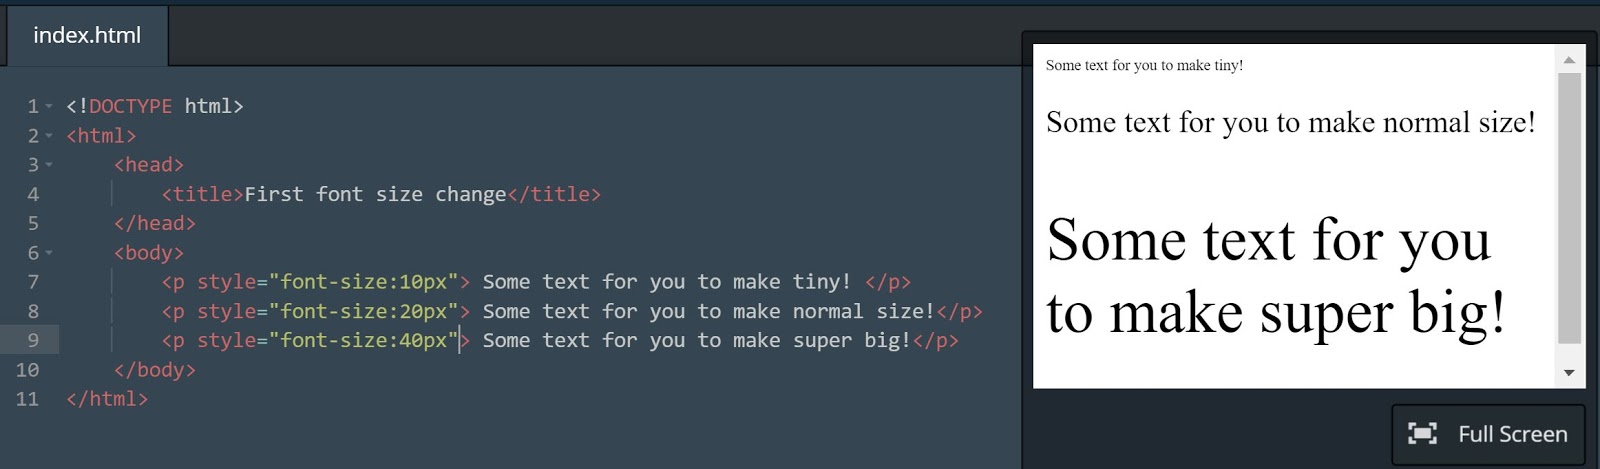
I didn't quite expect this so early on, but the unit moves into CSS, and explains it as the "skin and makeup" of the code, whereas HTML is the skeleton. This unit appears to be working with inline CSS, which works in the same file as HTML, so another document doesn't need to be incorporated. That being said, let's do this!
First up, font size:
And next, font color:

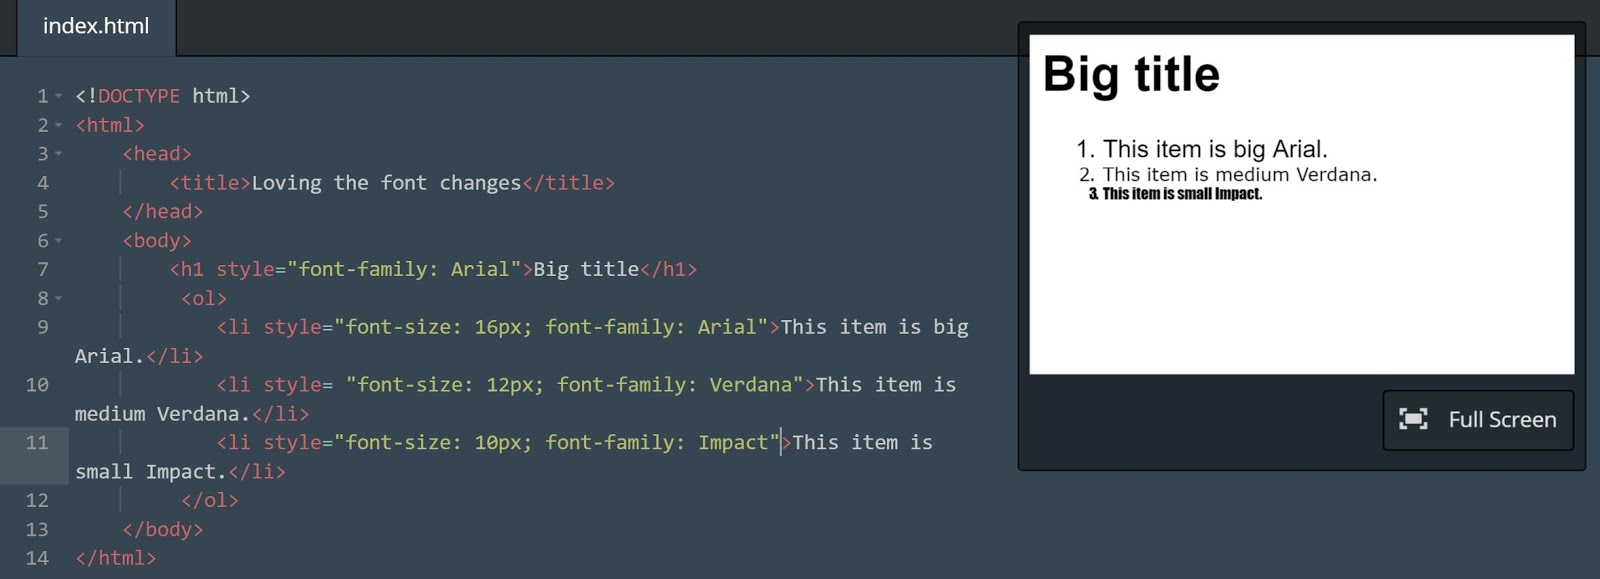
The next section is about font families, and I'm going to include this link, which Codeacademy directed me to. This is a really interesting page that shows different font options, and I enjoyed scrolling through it and seeing what my options were.
Progress!!
Next I tried setting a background color, which is another style command, i.e.: <body style="background-color:red;">. And check out this color blocking!

I realize this all looks very similar, but the slightest change in command means something completely different in HTML/CSS (think Spanish: Papa = Pope, papa = potato. Big difference there!)
This unit concluded with lessons on text alignment (center, right, and left), and then went into the <strong> and <em> commands, which I talked about earlier, and was already familiar with, so I'm not going to rehash that. But that was the end of Unit 2!
I am so excited to have picked up this topic for my project and, although I am ending my blog post on HTML and CSS here, I can see that the next lesson is in building a social networking profile, which is apparently something that can be done with a very basic knowledge of coding! I feel like I could go on and on with what I've learned, but I'm going to conclude with this:
No comments:
Post a Comment